Homemade TLR Camera
a practical introduction to optics and how to build your own TLR camera
 This project took me about 2 weeks to design and build the camera, 2 to 3 days per week, about an hour or two per day. It is not a hard project but it will require some attention to detail particularly for preventing serious light leaks, simple calculations such as the Pythagorean Theorem for proper focusing, and of course patience especially when taking photos.
Background
In Optics class we were assigned to make from scratch a functional film camera out of whatever supplies were available in the Research and Engineering room and from home.For my camera, I went with a twin lens reflex (TLR) design so I wouldn’t have to deal with the moving mirror component were I to have chosen a single lens reflect (SLR) design.
Unlike an SLR, a TLR uses two objective lenses at the same focal length. One lens is used for the viewfinder system (viewfinder lens) and the other is used for taking the photo (photographic lens). For more information on TLRs, see Wikipedia.
Camera Body (exterior)
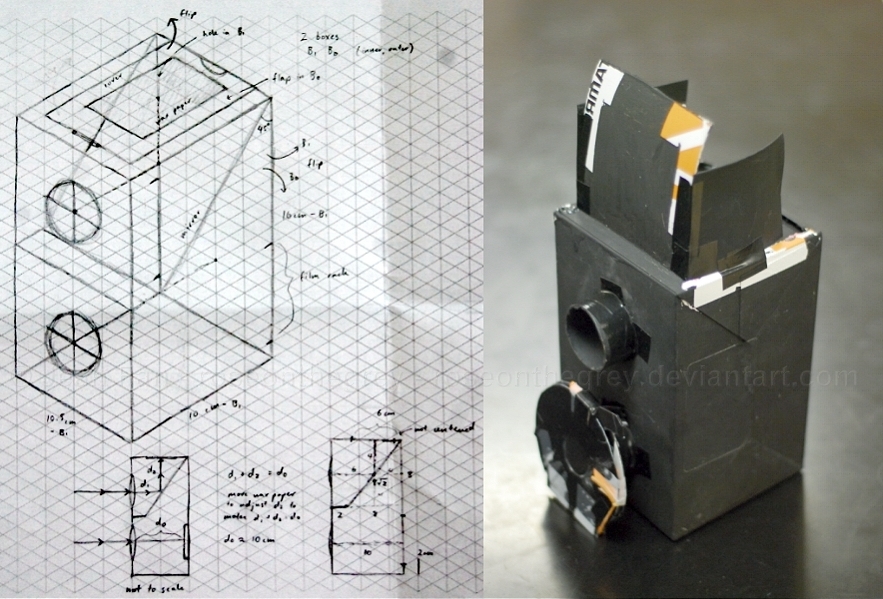
I used my Tamron 90mm F2.8 lens box as the basis for the camera. The good thing about the Tamron box is that it has two layers of boxes, originally for better protection of the lens. Two layers also helps prevent light leaks. The box design also allows for easy opening and closing of the camera for film replacement. I also considered using wood to make a box for the basis of the camera. However, I was working on a time limit and figured cutting wood would take a lot longer than cutting cardboard. If you have the time, I suggest using wood for a more durable product since cardboard falls apart with prolonged use.The entire box was painted black. The inside was painted black to absorb and prevent internal reflections of light were any light to get in. The outside was painted black for aesthetic purposes.
Lenses
For the lenses, I used two double convex lenses with a focal length of about 105mm. Double convex lenses can be purchased online for about $5. If you buy them online, the manufacturers will probably tell you the focal length. Old glasses should also make decent lenses. You will just have to do calculations to determine the focal length. An easy way to estimate the focal length of your lens is to hold the lens up to a light source such as a window. Allow light to go through the lens and project an upside-down image of the window onto a piece of paper. Move the piece of paper or lens until the image of the window comes into focus. When the image comes into focus, measure the distance from the paper to the lens and that will be your estimated focal length. Having a friend help is strongly suggested. If you can’t get the projected image onto the paper or if the projected image is so small you can’t tell if it’s focused, try adjusting your distance to the window. For more information, find an introductory optics lab assignment.The lenses were attached to wrapping paper rolls like really thick toilet paper rolls. Two holes were cut in front of the Tamron box to fit the wrapping paper rolls. Simple calculations were made to determine where the holes should be cut. The holes should be cut such that the distance traveled by light entering through the viewfinder lens, bouncing off the internal mirror, and up to the viewfinder is the same distance as the distance traveled by light through the photographic lens to the film. See the bottom left portion of the drawing above for more detail. This ensures that the focus seen through the viewfinder lens is a proper estimate of the focus achieved by the photographic lens and that will appear on film.
The wrapping paper rolls fit tightly into the holes in the Tamron box as to not allow light leaks but were still theoretically movable to allow focusing. However, both lenses were not designed to move simultaneously. This is something that should be fixed in the future. For now, just treat it like a fixed focus TLR.
Viewfinder
A hole was cut out of the top of the Tamron box. Translucent wax paper covered the hole to make the viewfinder. Do not use transparent plastic wrap or normal white paper. The translucent wax paper allows light to pass through diffusely such that light entering the viewfinder lens can properly project an image on to the viewfinder.Note cards were used to surround the viewfinder on three sides to prevent reflections and get better contrast on the viewfinder.
Camera Body (interior)
The inside of the camera was divided into upper and lower compartments with cardboard and a lot of black tape. Light must not be exchanged from upper to lower compartments and vice versa. Preventing light leaks from the top compartment to the bottom compartment does take some time, trial and error but it is necessary. Otherwise light will leak in from the top compartment to the lower compartment where your film is stored and ruin the film.In the upper compartment, an internal mirror was attached at a 45 degree angle to reflect the incoming image from the viewfinder lens to the viewfinder. Again, place the mirror such that the distance traveled by light entering through the viewfinder lens, bouncing off the internal mirror, and up to the viewfinder is the same distance as the distance traveled by light through the photographic lens to the film
The lower compartment housed the film which would capture the incoming image from the photographic lens. The image that appear on the viewfinder from the viewfinder lens was assumed to be negligibly close enough to the image that was captured on film from the photographic lens. However, there are still some differences between the two images simply due to the different placements of the two lenses so proper composition is fairly difficult.
Shutter
A rubber-band loaded leaf shutter was made from three floppy disks, rubbed bands and black tape. The shutter was attached in front of the photographic lens with a lot of black tape. I kept the shutter on the outside since putting the shutter inside would require more cutting, potentially causing light leaks. I won’t describe how the shutter was made since you can find that general information on Wikipedia under Leaf shutters. The only difference between my design and the Wikipedia described leaf shutter is I used rubber bands to pull instead of springs to push the leaf blade.And that's essentially how to make a twin lens reflex camera.
Taking Photos
Photos were taken on generic 3.5x5 (5x7 cut in half) B&W sheet film. I forgot the exact brand, but you can find them at B&H: [link] . If you don't want to buy sheet film, you can use normal roll film too. You will have to cut the film into small manageable pieces in a darkroom.To take a photo, in a darkroom cut the film and secure it in the camera. I just put some tape on the back of the film to secure it to my camera. Make sure your camera does not have any serious holes where light may leak in before you exit the darkroom. All film handling should be done in a darkroom to prevent ruining the film. But you do not need a professional darkroom. We just used our classroom and turned all the lights off except for one safe light. At home, I just use a dark closet. Then just open the shutter to take one photo and return to the darkroom. I strongly suggested that you develop your own film for more instant gratification. It took me a couple trials and errors to determine the proper exposure time.
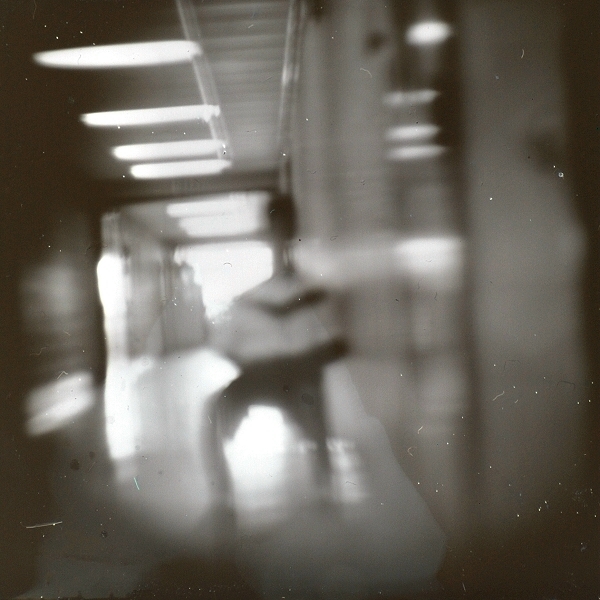
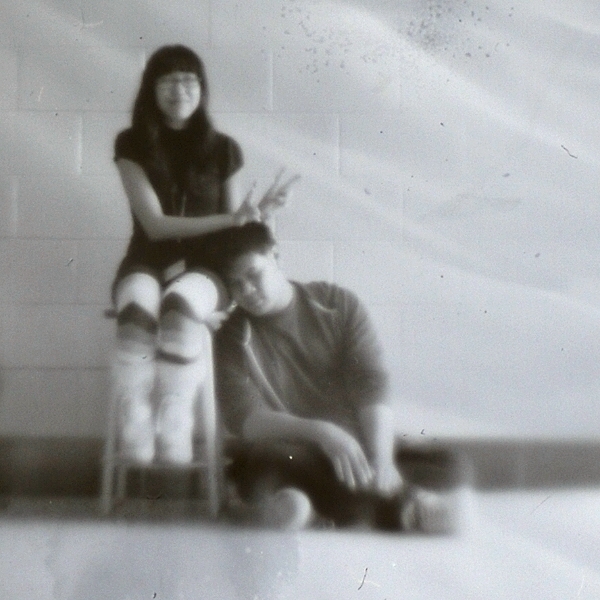
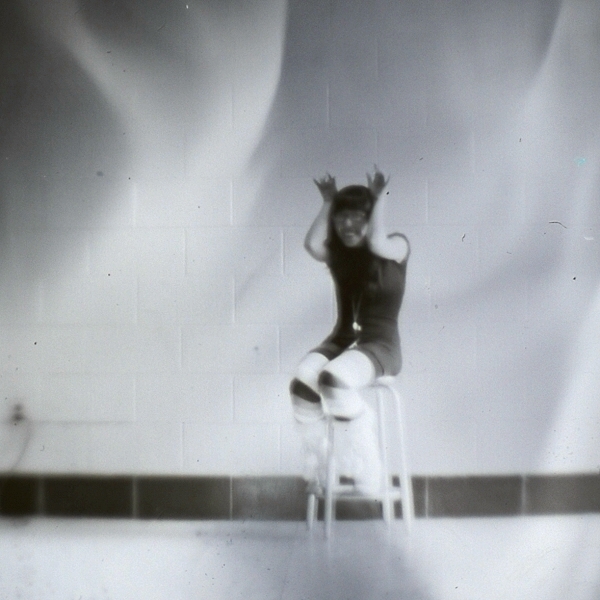
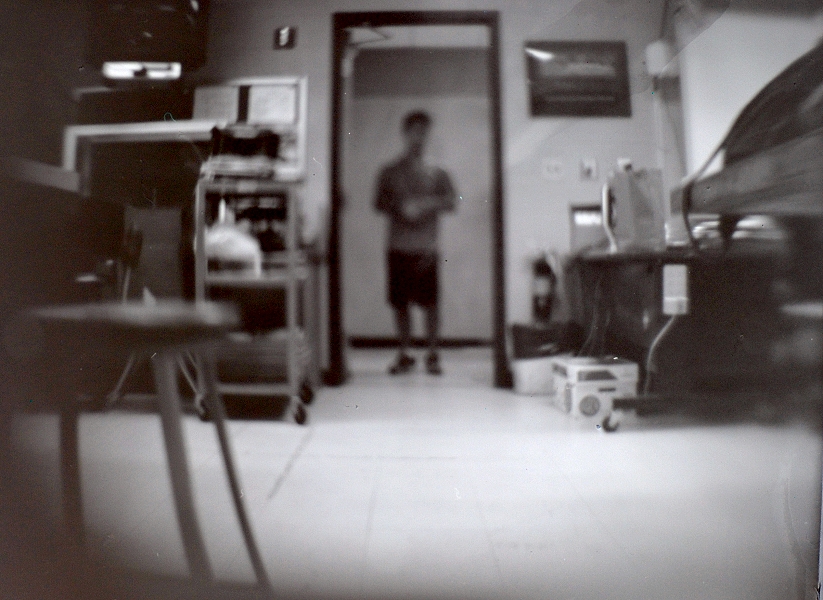
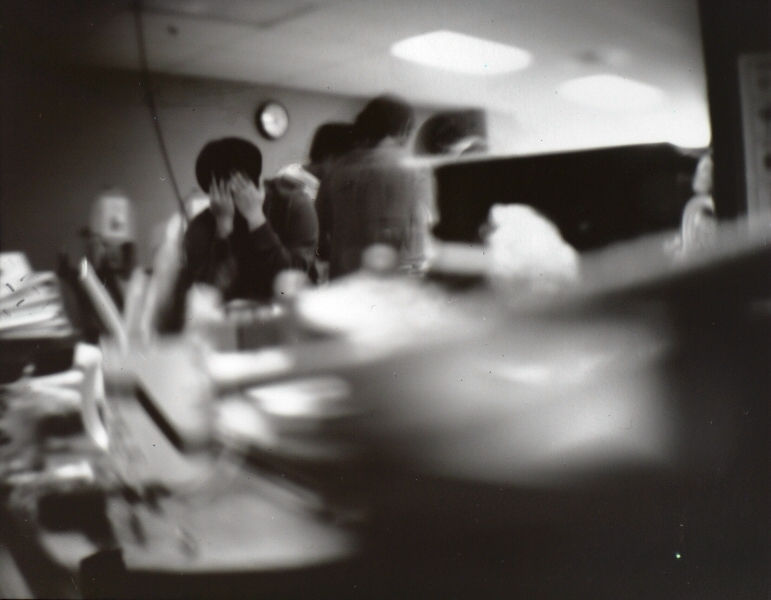
Photos taken using the TLR I made